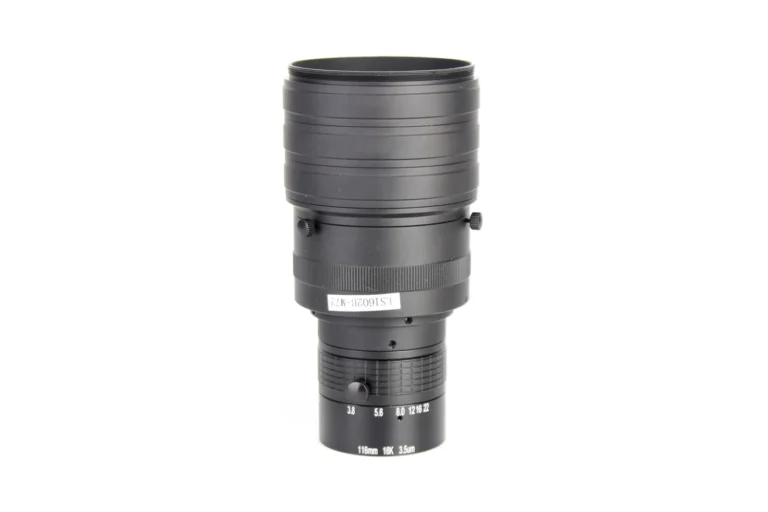
Clamps that have worn round belong to maintenance first, and to a missing specification second. The fixture failed its own upkeep when nobody defined or checked a wear limit on the jaws; your purchase spec failed too if no drawing ever named an approved clamping land for the maker to build to. Before assigning blame, do three things: retire the worn jaws so they stop touching anything, verify the focusing mechanism took no damage, and then change both sides at once, a fixture that physically cannot reach the focus ring, and a lens drawing that says exactly where a clamp may sit.
Whose failure it is, decided by evidence not blame
Responsibility follows the evidence, and the evidence here splits into three readable layers. Rounded, polished jaws point at a maintenance lapse: a wear item ran past its limit with no measured check in the plan. Intact jaws that still land on the focus ring point at fixture design: nothing positive stops them from traveling that far. And a lens that offers no unambiguous cylindrical surface to grip points at the specification: the purchase documents never told the maker you needed a dedicated clamping land, so the barrel arrived with a smooth section and a prominent, tempting ring next to it. In practice a line that has run for years shows a blend of all three.
Before anything else, protect the lens. Work the sequence on the units that were held by worn clamps:
- Rotate the focus ring through full travel. Note stiff zones, grinding, or backlash. Compare the feel against a known-good unit of the same model.
- Refocus at your working distance on a test target and check that the mechanism reaches focus smoothly at both ends of its range.
- Compare against the as-installed record. If the image quality on the station has not moved and the mechanism feels normal, the lens likely escaped.
- Send anything suspicious to the maker’s bench rather than back to the fixture, because a focus mechanism that was loaded by a clamp is a mechanical claim, and bench evidence settles it.
A lens whose ring was gripped repeatedly for weeks deserves the same suspicion you would give a dropped camera head: fine now is not evidence, measurement is. If the mechanism was damaged, the repair conversation stays honest because you can show when the clamps were retired and what the bench found.
Four wear patterns and what each one means
Not every misgrip is the same disease, and the treatment differs. Read the fixture and the lenses against four patterns:
| What you see |
Probable cause |
Disposition |
| Jaws rounded and polished smooth |
Normal wear run past its limit, no measured check in the maintenance plan |
Replace or rework jaws; add a wear limit and a check interval |
| Jaws intact, clamp still lands on the ring |
Fixture has no positive axial stop; travel depends on operator seating |
Add a stop or shoulder locating on the barrel land |
| Fresh clamp marks on the barrel land itself |
Clamp force too high or face material too hard for the barrel finish |
Set a force limit and use non-marring inserts |
| Focus stiff or creeping after remounting |
The ring or its mechanism took a load while clamped |
Quarantine the lens for bench verification before it returns |
The first two rows are the current incident. The third is the injury the fix is supposed to prevent, and the fourth is how you find out the prevention arrived too late for at least one unit. Keeping this table next to the fixture, with dates filled in, turns a recurring argument into a log.
Ownership maps cleanly once the causes are separated. Maintenance owns the wear limit and the check that enforces it, because a wear item without an interval is a defect on layaway. Manufacturing engineering owns the positive stop, because geometry is a design decision, not a habit. Procurement owns the specification line, because the maker cannot build a clamping land nobody asked for. And the maker owns the confirmation: only they can state what land diameter, width and surface the barrel tolerates without shifting its optics. An incident meeting that ends with those four names on four actions is the shortest route out of the blame question this scenario usually invites.
Rebuilding the fixture so the ring is unreachable
Fixture work has a natural order: restore what wore out, remove the possibility of the bad engagement, then make the next wear cycle visible before it does damage again.
Restore the jaw profile instead of shimming it
Round jaws cannot be padded back into service. Replace or re-machine the jaws to a profile matched to the barrel diameter, and prefer replaceable inserts over hard-faced originals, because the insert is the wear item and it should be cheap, stocked and quick to swap. Match the insert material to the barrel finish: a hard jaw on a soft anodized barrel cuts its own marking problem into every lens it holds.
Add a positive axial stop at the barrel land
Grip strength does not keep a clamp off the focus ring; geometry does. A shoulder, collar or stop that locates the lens axially on a fixed section of barrel makes the correct seat the only seat, so an operator cannot park the clamp on the ring even by accident. The same principle that keeps a set screw from walking a board lens off its alignment applies here: locking forces belong on surfaces designed to take them, a lesson the S-mount locking work covers from the optics side.
Give jaw wear a measured limit in the maintenance plan
“Looks worn” is not a maintenance trigger; a number is. Pick a measurable property of the jaw, profile depth or remaining insert thickness, define the limit that triggers replacement, and check it on a schedule. This is ordinary process monitoring: track a measured value against a defined limit and act on the trend instead of the failure, the approach the NIST process monitoring handbook formalizes for any measured characteristic. A check that takes one minute per holder per month is cheaper than one relitigated focus mechanism.
The lens-side lines that belong in your purchase spec
The fixture fix stops today’s damage. The specification stops the next generation of it, because a maker who knows your fixture needs a clamping land can build the barrel to cooperate. Ask for these lines to be added to the drawing and confirmed in writing:
| Spec line |
What to ask the maker to commit |
Why it survives the line |
| Approved clamping land |
A fixed, non-rotating cylindrical section, diameter stated, outside the focus mechanism |
Gives the fixture a datum that cannot load the focus parts |
| Land width and position |
Width sufficient for the jaw face, axial position dimensioned from a reference face |
Fixture design and inspection both read the same numbers |
| Keep-out from the ring |
Minimum clearance between land edge and focus ring, marked on the drawing |
Turns “careful” into geometry |
| Surface and finish |
Finish and hardness on the land compatible with non-marring inserts |
The land wears, not the lenses or the jaws |
| Clamp force statement |
A maximum force the maker confirms the barrel tolerates without deformation |
Gives maintenance a setting instead of a feeling |
Handleability is a purchasable property, an idea the grip as a specification article develops for hand tools; clamping lands extend it to fixtures. The land is an ordinary machined feature, so its diameter gets measured the way any diameter does:

M12 lenses show the maker side of the bargain: their focus locks are built into the lens family rather than improvised at the station, which is exactly why the M12 lens family survives handling that ruins improvised setups. A barrel that tells every fixture where to hold it is not a luxury. It is the cheapest fixture feature you never machined.
Close the loop across every holder on the floor
One fixture wore round, but rarely alone. Sweep every holder of the same model for the same wear, because jaws installed in the same batch are dying on the same schedule. The sweep is quick when the wear limit already exists: check each jaw against the limit, confirm the positive stop is present and undamaged, and look at what the insert is made of now versus what the drawing says. Give each holder an identity in the log, with the jaw install date, the limit, the measured value and the date of the next check, so the paper answers questions the memory cannot. Stock the insert as a wear part with the rest of the spares, and store it dry so the spare is ready when the limit trips. Record each event, the retires, the bench findings and the spec change, in the maintenance plan, so the next audit question has a file behind it.
Then close the circle with the habits that keep optics honest over years: verify remounted lenses against the as-installed record so nothing drifts silently, and treat a focus mechanism that now runs stiff as a service question first, per the stiff focus ring decision guide, rather than an excuse to keep clamping. The fixture got its jaw profile back, the drawing got its land, and the floor got a check that trips before the damage instead of after it.
Written by Baker Zhao, Founder at Lensmind Optics